2

I’m now over at www.tworandomwordsblog.com

Hi all,

Looks like I’ve been getting some traffic at this site – please note I’m now over at www.tworandomwordsblog.com, and I’ve turned off my automatic redirection. It might be worth checking if your subscription is for the old wordpress site – if so, I’d love if you updated it so you can keep following the blog!

1

Changing domains: bear with me

Hi everyone! Just a quick note to say I’ve switched my blog over from wordpress.com to a self-hosted wordpress.org domain. That means the domain/URL has changed from http://www.tworandomwords.wordpress.com to http://www.tworandomwordsblog.com. I’m in the process of getting everything shifted over, including comments.

For those who follow via bloglovin: I have contacted bloglovin and the process should be automatic. I think I can do the same for those who follow via email.

For those who follow via wordpress, unfortunately I don’t think I can do anything to help the shift, so if you use a different RSS feeder as well I’d love you to follow me there. For anyone who just loads up the URL, every post will be automatically redirected here so you don’t have to do anything either!

I’ve tried to make it as easy as possible for everyone (although I should have waited for redirection until AFTER everything was sorted out, whoops). Everything should look the same as I haven’t changed themes yet (that will come later). Please tell me if there are any issues with the new site, or if there’s anything missing! I’ve also changed over to disqus for the comments because I like getting notifications when people reply to my comments and I figured you would too.

Mr. Guy sent me this .gif just for this post.

https://i0.wp.com/www.tworandomwordsblog.com/wp-content/uploads/2014/05/speeded.gif

12

Plaid Flannel Negroni

Hooray for Indie Patterns Month! Although actually this year there will be a two-month celebration, given that the annual Indie Pattern Month being run by The Monthly Stitch is in June, and the month organised by Mari from Seamster patterns is in May. It’s a busy month with Me-Made-May as well and this week is Selfish Sewing Week on Kollabora.

I kind of missed out on the selfish sewing week because (other than the bra) I only sewed for Mr. Guy this week.

Image

I’m quite a fan of checked flannel shirts, and have wanted to make him one for a while, inspired by “The New Zealand Legend”, the Swanndri. After I had such success with his first shirt, I decided to finally get around to making him one. I can call this one a success as well, he’s worn it almost every day since I made it!

ImageI used Lladybird’s tutorial when cutting out the fabric to ensure all the stripes matched. I thought I had made sure the sleeves matched as well but I’m thinking that the flatness of the sleevehead means you can’t match? I don’t know, it didn’t work anyway. But everywhere else – that is some MATCHING, ladies and gentlemen! I would like to point out the matching stripes at

  • The front
  • Both side seams
  • Each pocket and pocket flap! That one required re-cutting
  • The sleeve placket and cuffs
  • The collar!
  • Even the damned facings match even though there’s no way you’d be able to see that.

ImageOnce I get a hand sewing needle and stitch the pocket buttons on, it’ll sit flat and the stripes will line up PERFECTLY

I’m surprised I got it all so lined up, I used every last bit of fabric I had – which was only 104cm wide! Luckily I bought 3 yards*. I’ll admit the collar matching the shirt body was accidental, but it is a beautiful sight. I initially cut the yoke to match the body of the shirt but Mr. Guy thought it would be better cut on the bias, and he’s right – even if the lines matched in the middle they wouldn’t have on either side once the pleats get in the way.

* srsly I’ve decided to pretty much stop buying fabric from online – they only cut the exact measurement (and it’s usually in yards rather than metres), unlike our fabulours local sewing ships, and it’s often really narrow. Plus all the other obvious stuff like, supporting local, travel miles, not being able to feel the fabric.

ImageI made no changes to the fit since it fit perfectly in the first place, although there was something weird going on in the front (too much fabric at the center front so I chopped it off). The facing of the last version can swing open sometimes and you see the little seam there, so this time I did my trick of sewing the facing and interfacing right sides together, then turning and pressing so the seam is nice and pretty. I also, y’know, used black interfacing (unlike the white interfacing in the navy linen shirt) which helps.

I also drafted a collar stand and proper collar – when I asked, Mr. Guy said he would much prefer that to the camp-style collar, and even Zara from Off-Grid Chic said only Hawaiian shirts are allowed to not have a collar stand. For lack of a better option and following the suggestions on the Male Pattern Boldness – Men’s Shirt Sewalong, I traced off a pattern piece from an existing shirt. This worked well except I must not have had a right-angle at the “cut on fold” side. It looked a bit weird but luckily I was able to save it. Next time I might try and add a button placket rather than having a facing.

ImageThe only thing I don’t like is how the pocket flaps attach – the edge isn’t finished and because the back of the fabric is white, it looks bit odd, but not many people will see that. I guess it’s a sign of me growing up as a sewer that I care how so much about how the insides look.

ImageI love how this shirt turned out, and am quite jealous of Mr Guy – I tried it on and it’s soooo comfortable, so I’m just waiting on some muslin before I can plan my own flannel Archer shirt.

Details

Pattern: Negroni shirt by Colette Patterns

Fabric: Cotton plaid flannel from fabric.com, about $25 including shipping

Notions: Interfacing, thread (stash) and buttons, $3.70

Total: $28.70

ImageHave I convinced anyone else to try making stuff fo’ yo man? Sonja, I’m lookin’ at you. Look at that happy face.

19

And she produces… a bra!

Guysguysguys, I MADE A BRA

ImageThis is something that even a few months ago I wouldn’t have believed I would do. A proper adult bra with underwires and everything.

I had been dreaming of making bras for a while but figured it was such a specific skill set it would take ages to get even close. Meg posted about her Bra Quest and that brought it more into the realm of possibility, and I decided to try and start my own bra quest, thinking it would be a long time until I had something that I could wear comfortably.

After reading several reviews I decided to go with the Pin Up Girls Classic Bra by Bra Makers Supply, and I went with a kit from Summerset rather than trying to source every bit myself and ending up with a hodge podge of colours – this is Wedgewood Blue. While the supplies took a while to get to me, took even longer to finally build up the courage to make it. I traced off the pattern and it sat for a week before I pulled out the fabric. (Note: I used my regular tracing paper and I wouldn’t recommend using something so flimsy, because the pieces are so small I think you should really use the cardstock and trace route rather than tracing paper and pinning).

ImageSorry for the poor photos – the shiny material is difficult to photograph

I did make a muslin with underwire and everything (just missing the elastic, using woven fabric for the straps and muslin for the band) and while I did make a change, in retrospect it may have been the wrong fix! I’ve worked out over the last year that I have a broad base relative to cup size, so I need quite a large underwire. When I tried on my muslin I had fabric pooling in front of the side of the underwire so I took that out – but now the underwire sits a bit too close at the underarm. Neither of my bra fitting books deal with this so I’ll either add back the fabric I took, or try and lever the underwire out at more of an angle (does that make sense?). The second fix I can try on this actual bra so I’ll see how it goes.

Image

I’m really truely surprised at how good this looks, and how easy it actually was – although it did help to have experience with stretch fabric, and other lingerie (I’ve made lots of underpants) as it’s quite fiddly. I found the bra sew-a-long by Cloth Habit extremely useful.

 The bra has some issues with construction but they’re mainly just aesthetic – the zigzag being too big, etc.Also, I stupidly got my left and right lower cups mixed up so the shape isn’t quite right and there’s some pulling.I did my bar tack at different heights on the bridge casing and I suspect it’s causing problems with the underwire sitting in the wrong place.

Most importantly though, it fits, and fits reasonably well – I wore it for the first time today and while there is a small amount of irritation under the left breast, it’s pretty comfortable! And it’s pretty – I like how it all matches, including the rings and sliders. I decided to put the sliders at the front because it’s sooo annoying tightening a bra strap when they’re at the back, amirite?

ImageA few other bloggers who have recently made bras commented how odd they felt in soft-shell cups rather than padding – I don’t wear padded bras so this isn’t an issue for me. Most of my RTW bras are partial-bands so maybe part of my discomfort comes from a full band, I’m not sure. (The most annoying this about all of this is I don’t quite know WHY I’m getting the discomfort). I would love to make a long-line bra and it should be pretty easy, particularly if I put boning in the sides.

ImageNot sure what else I can say, other than “I have caught the bra bug” – I can see why most bloggers who have made a bra haven’t stopped at one (and this is surely the best bra set in the world – it matches my shoes!), and I’m looking forward to being a fancy lady having matching underwear sets (that don’t cost $100+).

Has anyone else made bras, or thought about it? What about lingerie? I’ve also got the two Ohhh Lulu bralet patterns, which I keep meaning to make again (sooo comfortable). I do make my own underpants as well which is cheap and quick to do once you have a good pattern (I have Ohhh Lulu’s Ginger and Betty patterns found here, and Jalie 3242).

Details

Pattern: Classic Pin Up Bra from Bra Makers Supply, $27

Fabric and Notions: Wedgewood Blue kit from Summerset, $29. It came with this beautiful lace too but I FORGOT to put it on

Total: $56. Not tooo dissimilar from a fancy bra, although I used to rough it and buy $20-30 ones.

ImageFull sun!

27

Curvy Colette #2: Show Me the Moneta’s!

This is my second post for the Curvy Colette Blog Tour. When you’ve finished reading, why not check out the rest of the posts:

Wednesday, April 16th: Jenny at Cashmerette
Thursday, April 17th: Mary at Idle Fancy
Saturday, April 19th & Sunday April 20th: Laurence at QuirkyPrettyCute
Monday, April 21st:  Tanya at Mrs Hughes
Tuesday, April 22nd and Wednesday, April 23rd: T at UandMii
Thursday, April 24th: Jenny at Cashmerette
Friday, April 25th: Mary and Idle Fancy
Saturday, April 26th and Sunday, April 27th: Sophie-Lee at Two Random Words (me!)
Monday, April 28th: Mary at Young, Broke and Fabulous 

Welcome to my second post for the Curvy Colette blog tour. This time, I’m here with their new dress pattern, the Moneta. This is a simple, but cleverly designed knit dress but 5 extra collar options. Readers, this dress is rad.

Image
When I got the Tiramisu dress by Cake Patterns, I thought “this is it! Comfortable dress that looks good” and planned to make a heap. After making it twice (the first had poor fabric choice, the second got stained somehow on the first day I wore it) I realised that the shape/design didn’t really suit me – the bias skirt made my hips cu-razy (especially with the pockets) and for the seams to sit in the right place the mid panel would have to be 15cm long, which looks odd. So without a pattern, I’ve been sewing purely woven dresses. Until the Moneta.
The pattern has a fitted bodice, shaped quite differently from other knit bodices I’ve seen, short- or long- sleeves, and a gathered skirt with in-seam pockets, which because of the fuller skirt are hidden well.
 https://tworandomwords.files.wordpress.com/2014/04/p1070694.jpg
This version is made from a knit I bought at last years Fabric-a-Brac, I’m not sure of the content but it feels like a viscose, heavy but quite thin. I had just enough of the fabric and couldn’t fit on sleeves, and thought a collar would be too busy so I went with the plain sleeveless version. It’s lined with leftover “ponti” from my Mabel skirt (which is, in fact, the perfect weight for a bodice lining, go figure).
Image
Size cut: I cut the size L in the bust and waist and an XL in the hips.
Changes made: Thinking this might be a bit short on me, I added 10cm to the length. This was TOO much length to add, when I tried it on before hemming it looked… weird. I did a 3cm hem (just zig-a-zag ahh’d) but it could be a couple of cm shorter.
Things to change next time: Because the bodice is drafted for sleeves, when I made it sleeveless the shoulder seams are a bit too far over – which I think is the reason why I have some gape at the front. Next time I make it sleeveless I’ll narrow the shoulder a bit and see if that helps. I also felt that the waist seam was a touch too high so I lengthened the bodice 1.5cm.
https://tworandomwords.files.wordpress.com/2014/04/p10706881.jpg
Now because I had so much success with this first one, and only kind of because The Monthly Stitch’s April challenge is “Sew Double”, I quickly made up another version, this time with my favourite collar:
https://tworandomwords.files.wordpress.com/2014/04/p1070640.jpg
This version is made from a merino-viscose blend from The Fabric Store. I had initially bought it to make another Sew Over It Wrap Dress, but I hadn’t got around to it yet, and my stash knows that my plans are only solid until another plan comes to mind. Annoyingly, the stripes are completely off-grain (by about 20-30 degrees) – when cutting the skirts I had thought I made them straight, but they shifted (silly for cutting on the fold). Luckily it’s not very obvious (small stripes and gathered skirt) but I had to be a lot more careful when cutting the bodice/sleeves/collar.
https://tworandomwords.files.wordpress.com/2014/04/p1070664.jpg
This version has the added 1.5cm length to the bodice, so I don’t know if that was too much fabric (amazing how 8mm will make such a difference with comfort) or if it’s because the fabric seems to have stretched vertically a bit – the hem feels a bit longer than it did when I first made it.
https://tworandomwords.files.wordpress.com/2014/04/p1070669.jpg
Other than that, this dress is so good. The collar is cute as, even if Jessie-Dog got excited when we were playing and somehow bit a hole in it, meaning I have to tie it weirdly. It’s a thin merino wool which means it’s appropriate for all seasons. Because it’s thin and extra stretchy it does show bra straps etc which is annoying but I can live with that.
https://tworandomwords.files.wordpress.com/2014/04/p1070648.jpg
What else to say? These photos were taken on our anniversary weekend again (this time with crappy weather) – the first is in the harbour of Okiato, a tiny town that was New Zealand’s first ever capital before it was shifted to Auckland in 1841 (later moved to our current capital, Wellington, for political reasons). There was also some FLASH houses there. The second dress was photographed at Flagstaff, where the British flag was cut down 4 times in protest against colonisation. We also got to see where the Treaty of Waitangi was signed, which was cool.
https://tworandomwords.files.wordpress.com/2014/04/p1070679.jpg
Details
Fabric: Houndstooth knit from Fabric-a-brac, $5, leftover knit for lining. Merino-viscose knit from The Fabric Store, $45
Notions: Thread, interfacing and elastic from stash (I used picot elastic because it’s all I had but I don’t think it’s quite strong enough)
Total: $5 and $45
25

Curvy Colette: My Mabel Skirts

This is my first post for the Curvy Colette Blog Tour. When you’ve finished reading, why not check out the rest of the posts:

Wednesday, April 16th: Jenny at Cashmerette
Thursday, April 17th: Mary at Idle Fancy
Saturday, April 19th & Sunday April 20th: Laurence at QuirkyPrettyCute
Monday, April 21st:  Tanya at Mrs Hughes
Tuesday, April 22nd and Wednesday, April 23rd: T at UandMii
Thursday, April 24th: Jenny at Cashmerette
Friday, April 25th: Mary and Idle Fancy
Saturday, April 26th and Sunday, April 27th: Sophie-Lee at Two Random Words (me!)
Monday, April 28th: Mary at Young, Broke and Fabulous 

There are some patterns that as soon as you make and try on, you laugh. Why on Earth haven’t I made one before??

Image

Colette Mabel is one of those patterns. I used to have a black knit, princess seamed skirt that I loved, and wore all the time. At least once a week. One day a year or so ago it went missing and ever since I’ve thought “I should really make one of those”. I’ve half-heartedly tried a couple of times, using this pattern from Burdastyle, but they ended up going to my sister-in-law Tough Chick.

When Colette Patterns released their two new patterns, the Mabel skirt and Moneta dress, it took a bit of time to sink in. “Oh, some basic knit stuff, how nice” and on I continued with my day. Then I realised – this is EXACTLY the sort of stuff that’s missing in my hand-made wardrobe. With Me-Made-May coming up, I’ve really had to think about which garments I reach for more than others, and what kind of things I’m missing.

Image

This pattern has definitely filled a gap in my wardrobe. It’s quick to make, quick to pull on and sooo comfortable. I would warn you though: be very careful what kind of fabric you use! Being so far away from any fabric stores, I bought this online and while it was described as a Ponti de Roma “knit wear, tops, skirts and pants”, it’s a bit thin for this kind of thing. I cut the XL size, grading to a size L at the hips, and it’s a bit clingier than I would like.
https://tworandomwords.files.wordpress.com/2014/04/p1070588.jpg

At first I thought I would have to give it away as it was showing all sorts of bumps and VPL’s, but I’ve found myself reaching for it quite a lot. Unfortunately the fabric has already started to pill, only a week after making it (and wearing it about 4 times since making it).

https://tworandomwords.files.wordpress.com/2014/04/p1070584.jpg

Thinking that the clinginess was a combination of the fabric choice and the pattern being slightly too small, I quickly made another one to test out the theory. Luckily I had just cut out a jumper for Mr. Guy and had easily enough of this wool blend leftover:

https://tworandomwords.files.wordpress.com/2014/04/p1070600.jpg

This second time I traced off the 2XL for the front side panels, giving me more room all around. I chose only that panel to trace bigger as I wanted the princess seams to sit further towards the middle, so they sit over the “fullest” part of my puku (stomach). You’ll also note this version is longer – while my black one has 2cm added to the length, when I walk it rides up to sit at mid-thigh. This version has a total or 12cm added to the length, and a 1.5cm seam allowance (for reference, I’m 178cm or 5’10”)

https://tworandomwords.files.wordpress.com/2014/04/p1070592.jpg

This is a much more “work appropriate” length, and is what I usually wear, although the shorter black version is nice to make me feel a bit like a babe (and it’s nice to finally have clothes that I can only wear out of work, rather than everything being work-appropriate – I don’t feel I can wear my ships or lobster dresses to work, for example).https://tworandomwords.files.wordpress.com/2014/04/p1070615.jpg

You’ll see that this thicker fabric still shows a lot of lumps and bumps, so it’s nicest with a cardigan over it. It’s quite thick so I can’t really wear a top over it (plus I don’t have many tops that are for wearing untucked). This is the main thing to be aware of when choosing fabric for this skirt – the more stretch the fabric has, the more it’ll show what’s underneath (because the fabric will “stretch” over the lumps/seams rather than sitting flat over them). Thicker fabric will help alleviate that, as would a fabric with two “layers” such as a terry knit. https://tworandomwords.files.wordpress.com/2014/04/p1070599.jpg

 I just love my facial expression in this photo.

What do you think of the new Colette patterns? I’m absolutely stoked that they’ve graded their patterns up – yes, I fit their standard block (although I would grade up in the hips) but so many women are stuck using Big 4 patterns because the indie patterns don’t go big enough. When looking at the patterns you can tell they actually did a fair amount of work getting a good “plus sized” sloper, as there’s some extra shaping in the 2 and 3XL sizes, to keep the proportions right. Well done Colette!https://tworandomwords.files.wordpress.com/2014/04/p1070576.jpg

This is how short it actually wears.

Details

Pattern: Mabel by Colette Patterns

Fabric: Black ponti, $14 incl. postage. Grey and black wool, ~$15

Notions: Thread, stash

Total: $14 and $15

In case you were wondering, the photos were taken in Russel in the Bay of Islands, where Mr. Guy and I went for a few nights over this ANZAC weekend, for our first wedding anniversary. Damn but I love that man. You’ll see a couple more Bay of Islands photos in my next post for the Curvy Colette Blgo Tour – tomorrow!

5

Tough chick dressed by Sophie: part two

Earlier in the year I did a post about some clothes I had made and were now in the possession of my sister-in-law, Tough Chick (that’s what her TV show would be called, if she had one). I realised I hadn’t posted the second lot of photos and, while I’m on holiday and not sewing (it’s our wedding anniversary!) I would post the second lot. These photos were taken at the end of a long day so we ended up getting quite silly with the poses. Both the tops were RTW tops that I gave to her as well. Even the shoes were once mine! Tough Chick doesn’t like shopping very much.

The first two are both made from this Burdastyle pattern and both ended up a bit too small for me. The first is made from a purple cotton ponte from The Fabric Warehouse

ImageImageIt doesn’t have a separate waistband or facing; instead, the top is folded down and tacked in place, so it looks seamless but it a bit harder to fit if you have a big difference between waist and hips, like me.

The second one is made from a lavendar woven fabric (?content) with lots of stretch, leftover from another dress.

ImageThe following is an example of my learning curve when it comes to choosing fabric for projects. It’s a Hollyburn skirt that started out as the knee-length, but I cut the hem so wonky it ended up being quite short. It’s made from a polka dot fabric (either polyester or rayon, I can’t remember) that is so lightweight it’s obviously meant to be a lining rather than a full skirt!

ImageImageThe last skirt was my Christmas present to TC, and is a Colette Ginger skirt made from an acrylic fabric, lined with some kind of fabric (honestly, I should know all this, but they were all made before I had a really good handle on fabric selection). It’s hemmed with a lace facing.

ImageImageSo, that’s that. Last year I ended up getting rid of quite a few of my me-made items and although I’m getting better, I have a few items made this year that will end up the same way (hopefully TC wants them too). I’m not sure if it’s because of my fitting, or because I’m sewing styles that aren’t completely me? It’s so easy to get caught up in hype about certain patterns, or decide that you like a pattern so much without really thinking about whether it’ll suit you or not.

At least it’s better making your own than buying RTW, as I used to buy things purely for the fabric rather than the style (I would buy basically anything polka dot that I could find). Do you guys think it’s easier or harder to “shop to flatter” when sewing your own clothes?

30

Jean juice

ImageI’ve never really been someone who wears jeans. I think it stems from me being a bigger lady – I could never find jeans that looked nice, because I couldn’t fit pants from trendy young-people stores, so all that was available were shapeless numbers or mens pants. Sure, each winter I’d get jeans-envy from seeing everyone so comfortable in their jeans, so I’d go to the shops and buy which ever pair actually fit me. once the winter was over I’d suddenly look in the mirror and realise that I looked awful, so out they’d go.

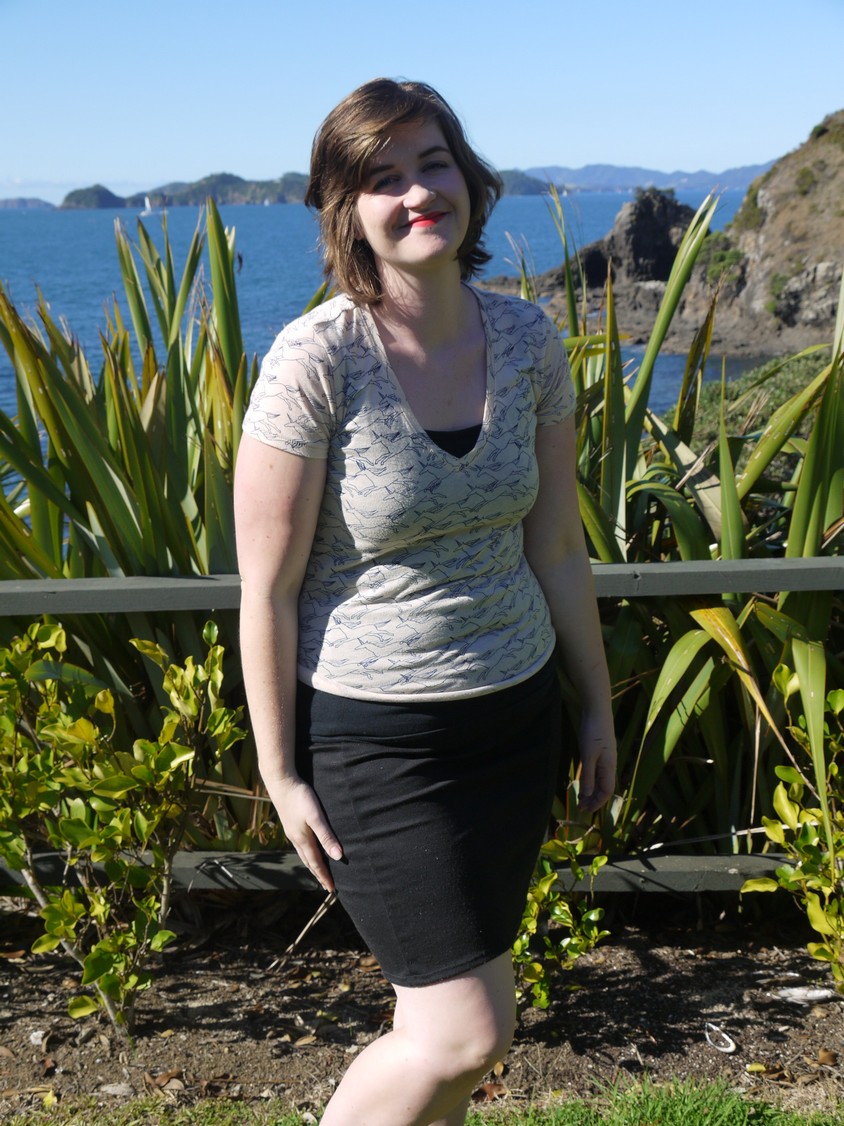
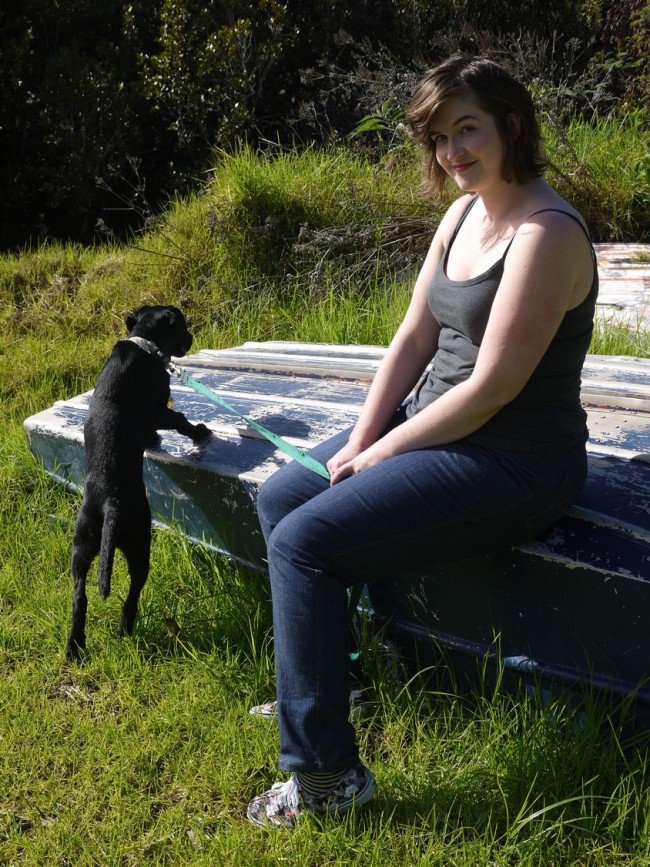
I have had one pair of jeans that fit me well/looked good, which I bought from Forever 21 and took in at the waist so they didn’t gape (you can see me wearing them in lots of my 2013 makes). They recently died (hole in the inner thigh) and I’ve been pant-less ever since. I finally realised that I should take the plunge and try making my own jeans. The results are…. so so.
https://tworandomwords.files.wordpress.com/2014/04/p1070459.jpg

On the one hand: I made a pair of jeans! And I did it rather well! But on the other hand, I don’t like how they look at all, and they’re definitely reminiscent of all the Jeans West jeans I bought when I was a teenager.https://tworandomwords.files.wordpress.com/2014/04/p1070500-copy.jpg

I used the famous Jalie 2908 “stretch jeans” pattern and my own pants sloper; here’s where the issue starts. Laying the slop on top of the jalie pattern, it appeared that I needed WAY more room than the Jalie allowed. As in, despite being a size W in the waist and CC in the hips, my sloper was bigger than the FF size. I ended up cutting the sloper size and chalking in the Jalie sewing line. I made up one leg, decided it was much too small, and went with the sloper size.

Obviously I forgot about the stretch. I tried them off after I finished the fly (which took two attempts, the second one much helped by this blog post) and they were baggy. I pinched out some fabric, they were better, so I went ahead and finished the seams. Now, I think they could probably have been made exactly as Jalie had drafted them, as I think some of the fitting issues come from being a bit baggy in places.https://tworandomwords.files.wordpress.com/2014/04/p1070457-copy.jpg

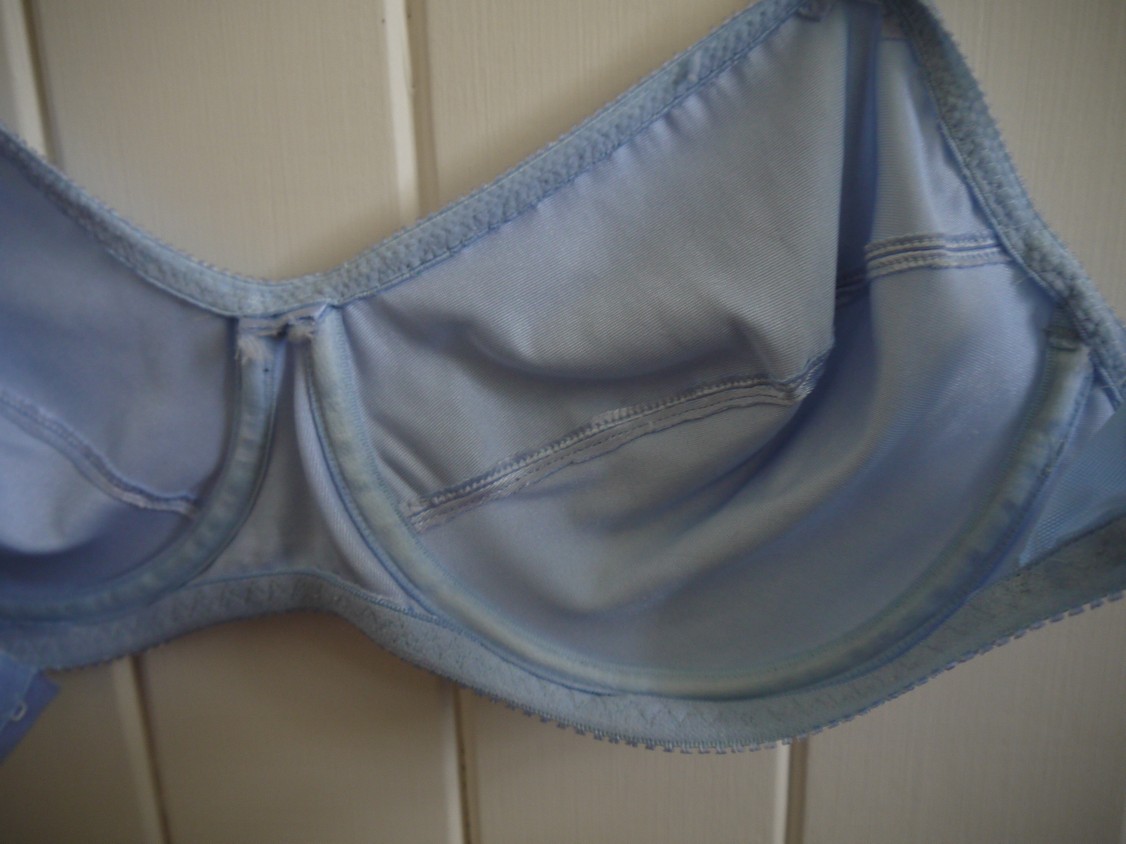
They’ve ended up looking a bit like “Mom-jeans”, which is a bit mean considering I don’t know many mum’s who wear the kind of jeans I’m meaning, but I’m sure you all know what I mean. They’re a funny cut in the leg and a bit baggy in the crotch. The waist, at least, I’m reasonably proud of – it took me like 3 hours to draft that waistband and except for the fact that I hammered in the buttons 2cm from where they should be, it fits well!

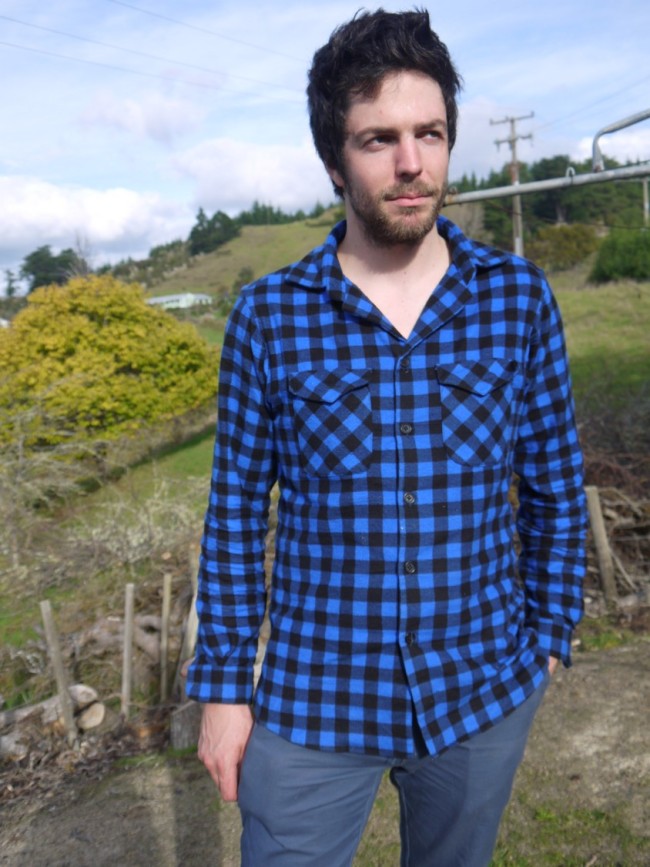
Overall I’m happy with the construction, and that they look like jeans. There’s a lot of topstitching and Mr. Guy even complimented how straight it is. The inseams are flat felled (the regular way, I didn’t realise you’re supposed to sew wrong-sides-together so the bulk is on the outside), the outer leg seams are overlocked and double top-stitched. As mentioned, the fly took to me two attempts, and I hammered the buttons too far over so they pull at the fly.

I didn’t just want plain lines on the back pockets, so I sewed some mountains:

https://tworandomwords.files.wordpress.com/2014/04/p1070474-copy.jpg

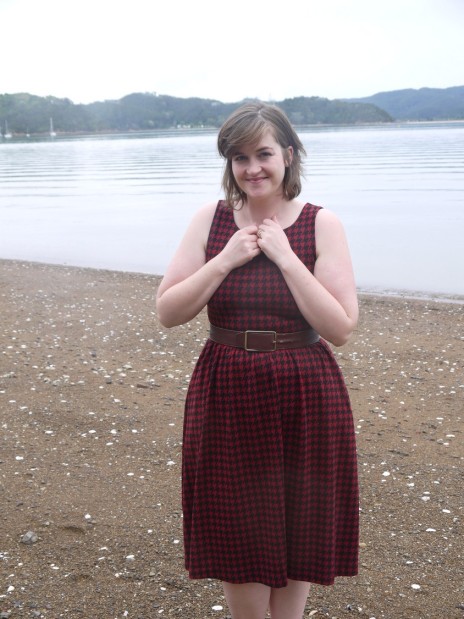
So I’m feeling very bleargh about these. When I look at the clothes I usually wear (skirts/dresses), these look awful in comparison, but I think jeans will always look average purely because of my body shape. Sure, these aren’t the worse jeans I’ve ever worn and they look pretygood from the side, but I still feel very frumpy in them. When I finished them yesterday I was feeling pretty crap, until I realised “these are the first pants I’ve ever made for myself”, and there’s lots of room for improvement. I can handle that although I had such hopes for these.

https://tworandomwords.files.wordpress.com/2014/04/p1070508-copy.jpg

These will probably end up as “mucking around/working in the garden” pants, which is fine with me. Next time I’ll try using a slightly stretchier denim and make them tighter, and will try making the pockets larger so they reinforce the front (maybe that will help suck in my tummy) – I remember reading that on Tanitisis’s blog though of course I can’t find it now. I also would love to get hold of some polka-dot denim.

https://tworandomwords.files.wordpress.com/2014/04/p1070462-copy.jpg

Details

Pattern: Jalie 2908 and pants sloper

Fabric: Sturdy stretch denim, $35

Notions: Jeans buttons, $1; interfacing and thread, stash; top-stitching thread, from Mrs. C, jeans zip $4.80. I bought rivets but didn’t use them.

Total: $40.80

Two other things: one, check out these most bodacious shoes. They’re “Vans for the ASPCA”, a friend posted them on facebook and I spent the next couple of days tracking some down. I even bought a pair of the matching dog ones for my nephew in Canada.

https://tworandomwords.files.wordpress.com/2014/04/p1070488-copy.jpg

Secondly, I was awarded a second Liebster award by Lazylinchen (which makes me think of lazy lichen, which makes me laugh because lichen is amazing). I’ve already done the nominating thing so I’ll quickly answer the questions. Skip if you don’t want to learn more about me.


1. What is your favourite pastime?

It’s probably not hard to guess that it’s sewing!

2. What do you love cooking/eating the most?

Pass! I just love eating.

3. What is you favourite fictional character and why?

Probably Alanna from the The Song of the Lioness series by Tamora Pierce. I love all of her books and I think I owe a large part of my feminist ideals to those books. Girls that kick ass, having to prove themselves equal to males and proving that they can even be better in a mans world.

4.  What do you like most about your life?

My husband, my job, family and pets ❤

5. How do you manage your stash (if you have one)? (This is shameless digging for solutions…)

I do have a stash, although I freak out if I have too many things in it. I’m trying to only buy things with a garment in mind but that doesn’t always work. I tend to just fold the fabric and put it on a shelf so I can see it easily and stroke it for inspiration, but I also have a box of fabrics that are my “one day I’ll have the skills/pattern to make that garment”.

6. What is your favourite make?

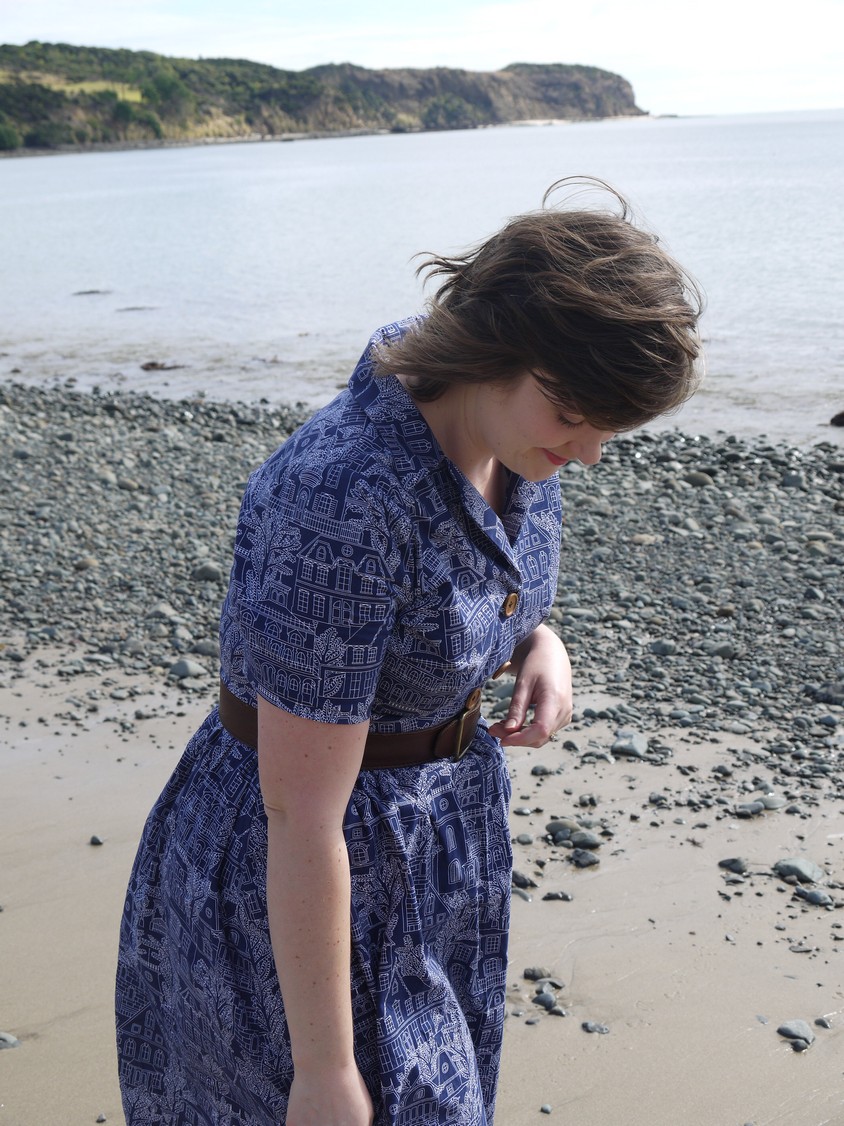
It’s probably still my Watson Jacket, it’s just so fancy. Or, more recently, my shirtwaist dress and Mr. Guy’s Jedediah trousers..

7. Which part do you dislike most about creating?

When I end up with a product that’s worse than RTW, whether because it doesn’t fit or because I goofed on the construction.

8. Winter or Summer?

Spriiiing, mainly because of all the flowers (this is more a thing in Christchurch, “the garden city” where the council plants thousands of daffodils around the city. Wellington doesn’t have many flowers)

9. If you could choose from any animal that ever existed, what pet would you like to have?

Dragon. Either a small one like a firedrake (that’s like a very intelligent dog) or a big one that I could ride around on.

10. Why do you sew/knit/create?

I started off sewing because I couldn’t find clothes that were trendy/cool that fit me. Later, when I could, I didn’t want to pay the price for those garments. Now I love creating for the sake of it, not being at the mercy of people who decide what’s in fashion (at the moment that seems to be “everything too short”), and it’s my way of expressing myself. Plus I’ve gotten to meet so many people through sewing, it’s rad

11. What is your favourite place on Earth?

  Pass again! I think it’s cheating to just say “New Zealand” but we really do have it lucky. Favourite place that I’ve visited outside of NZ would be Mexico

13

The “One Day” outfit featuring The Afternoon Blouse

For a while now I’ve been complaining (in my head) about two things: I’m desparately lacking in nice blouses to wear, and I need some more plain skirts. I’m attracted to bright colours and patterns which sometimes mean that my wardrobe looks like a higgeldy mess of colours and I have to pick through everything to find things that match. I am quite happy mixing patterns but sometimes it just gets a bit much, you know?

Image

So we’ve established that I can’t say no to brights. I’m also not to good at buying blouse fabrics – no idea why, but I think part of it is that lots of patterns call for almost 2m, and I figure if I’m going to buy 2m (and the fabric is usually in some way expensive), I might as well get a WHOLE outfit out of it. I can get a bit stingy with fabric, so I’ve been trying to get hold of cute patterns that use not-so-much fabric and don’t have lots of details that I’m not ready to tackly in delicate blouse fabric.

The Afternoon Blouse by Jennifer Lauren Vintage (from Dunedin, NZ, where I went to university) kind of meets both of those criteria.

ImageAlthough the “required yardage” is about 1.5m, I used vastly less than that – I had a 140x60cm piece and a much smaller piece that I was able to just fit the facing onto, so you should easily be able to get it out of ~90cm. The fabric itself is a rayon from one of the members of the Wellington Sewing Bloggers Network (erm, I can’t quite remember who it was, sorry and thanks!). I’m not sure if it’s vintage or not, but it has a few small stains on it that look like the ones you get on vintage tablecloths. All I know is I snapped it up as soon as my beady eyes caught sight of it, and didn’t ask any questions.ImageThe fabric is looovely and drapey and feels really nice to wear, and I love how it blouses over the skirt. I feel like I’m wearing a vintage grandma blouse and I love it.

Image

This photo is for Mary – this was the first photo we took! It’s damn windy here…

The blouse was SO quick to make. I even timed myself, and it took 90 minutes all up. In terms of construction, I basically followed the instructions (mainly I just glanced at the diagrams). The inside seams are finished with the overlocker and the hem and sleeves are all finished with a narrow hem. For the facing, instead of fusing the interfacing on and then finishing the edges, I sewed right sides together (using the glue side as the wrong side), trimmed the seam with pinking shears, then turned and pressed the interfacing down. This gives the facing a really nice finish without any extra stitching.

ImageFor some reason the only good photos from today were crazy photos.

In case you’re wondering about the skirt; yep, I made that as well. In the same evening as the top. Hence the “one day outfit”.

It’s from the Gertie’s high waisted skirt (previously made here, here, here and here). When I tried it on halfway through I decided I wanted it to be a bit more pegged than my other versions, so I took it in at the bottom of the side seams, and the bottom center back seam. BIG MISTAKE. I think that really needs to be a flat-pattern adjustment, because I can feel some weird pulling around the bottom. I was also left with a much shorter vent, which combined with the peggings makes it VERY difficult to get on (getting dressed may remind my husband of my pantihose dance). I also got some excess pooling at the bum:

ImageThis photo makes me wonder if there’s a fitting issue that needs fixing at the hips on my sloper, or if it’s just because I changed the bottom of the skirt. It’s not tooo bad but I do end up tugging it a bit during the day (and apologies about the wrinkles, I can only take photos after work and I do a lot of sitting-to-standing and back).

ImageI decided to straighten out the waistband, rather than using the curved one that I’ve done with all my other versions.

ImageI did an invisible hem and decided that it’s not the best idea on a vented skirt – at least, if you’re going to do it, do it before you sew up the center back seam! So it’s not the greatest black skirt, but it’ll do and I always have to remind myself that it still fits better than ready-to-wear.

ImageWhat am I doing here?

I actually really like the blouse – the funny fold-over front is cute although I will need to sort out some way to make it stay in place (it’ll help when I have hand-needles…I had to sew the waistband button with a sewing machine needle). It uses very little fabric and is quick, and the kimono sleeves give it a classy/casual look. I may use this pattern to make a plain v-neck kimono blouse for even more versions.

The black skirt I’m 50% happy about – I will wear it a lot because it’s so plain it will go with anything else in my wardrobe (and is one of only 4 black items in my whole place), but the fit is a bit off.

Details

Patterns: The Afternoon Blouse by Jennifer Lauren Vintage, $14 NZD, and Gertie’s high waisted skirt

Fabric: Black stretch cotton twill, $8,60 and rayon, free

Notions: Pale blue button and white and gold button (skirt), zip, thread and interfacing all from stash. Thread, $4

Total: $26.60 all up

23

Self-drafted Shirtwaist dress, and a sneak preview of the new Thread Theory pattern, the Thetis Undershirt!

I’ve always liked shirtwaist dresses. I don’t even know what is about them; perhaps it’s that they’re an easily wearable “vintage” look, along with the fit-and-flare silhouette that suits me so well. Regardless of the reasons I’ve always wanted a wardrobe full of them. Before I started sewing, they just weren’t available to me – the only ones I ever saw ran at about $200+ which was well out of my student clothing budget.

ImageI have tried sewing them twice before. The first, my Gertie’s Palomino Dress, was one of my favourite items for a while, but it has some serious fit issues; I successfully tackled the broad shoulder issue, but the bust darts are crazy. And I have several issues with the back – there is way too much fabric gathered into the yolk, and the shirred lower back results in some extremely unflattering gathers. I do still love this dress and get plenty of comments (including one elderly patient telling me that it took him back to the 60’s), but I don’t want to make the base pattern again.

ImageI then tried to use my princess seam bodice sloper and the Gertie’s pattern to draft a better-fitting version, seen here. The bodice of this one fit well, but for some reason the collar (which was borrowed from the Gertie pattern) is way too short; I dislike the buttons that I chose; and it ended up with an a-line skirt because I didn’t buy enough fabric. Looking at the photos, it isn’t as bad as I remember, but I think I gave this dress away.

It’s taken me a while to get the courage to try again… and I think I’ve almost cracked it

ImageI would go so far as to say I drafted this myself; although it’s based off several different patterns, I had to alter them significantly and have ended up with “my own” pattern. The bodice front used a combination of the Gertie Shirtwaist, La Sylphide, and my princess seam sloper. It started off with just one (vertical) dart and I ended up adding in a bust dart, by figuring out how much needed to come out of the side, marking my bust point on the muslin, and aiming the dart there (finishing 1″ before).

I then rearranged both darts to make the center of the dart parallel and perpendicular to the grainline (does it annoy you when the dart pulls funny when you’re forming it? I’d never thought about it before but figure the reason is that they’re off grain). The bodice back is the La Sylphide/my bodice sloper back piece, cut on the fold. Sleeves are from my sloper.

ImageThe collar is my only issue with the dress (GUYS THERE’S ONLY ONE THING I DON’T LIKE). I used the pattern piece from the Negroni shirt, as I think the Gertie dress uses a one-piece collar. It hasn’t worked and makes the back neckline gape weirdly. Although it’s not ideal, though, I’m perfectly happy with the whole thing because it still looks awesome and now I know. Next time I’ll draft or find a collar stand and collar.

ImageOnce I had the pattern sussed, I pulled out the only fabric in my stash that I thought would work… and realised that it’s a large scale pattern. I should pattern match. Crap.

I’ve never really done much pattern matching before – I used to not even be aware of it, and I often just bypass it on smaller print stuff. After my accidental-matching on my lobster dress, I realised how gutted I would have been if it was way off. So I decided to bite the bullet and do it.

ImageI did it! Because it’s buttoned up and not just a regular seam, I had to work out where the two patterns would actually meet. I marked the center front on the pattern piece, then cut out one piece (on the flat). I then folded the fabric under at the center front and laid it on top of the fabric, lining up the pattern – then lair the pattern piece down (in a mirror image), removed the first bit of fabric, and unfolded the center front. If you like pictures, Sewaholic and Bind The Seams both have pictorials. I’ve just clicked that “pictorial” probably means picture tutorial.

ImageBecause the dress is only buttoned to the waist, I added a lapped zipper to the side seam. This also meant that the buttons would be non-functional, so I decided to sew most of the front shut and sew the buttons straight onto it. The top button is still functional and I had a hell of a time with my automatic buttonholer, as it wanted to make a buttonhole 3x shorter than I needed (it’s funny how a malfunctioning convenience tool makes you so much madder than if you didn’t have it at all).

ImageI have so many zips, but they’re not very often the colour that I need.

ImageLike my last few dresses (and another one almost finished), the skirt is an a-line gathered skirt, and for this version, both the front and back skirt were cut on the fold. And the hem is my first actual ever blind hem. Oh my glob guys, it is amazing – why have I never done one before? It only took a little bit more fussing with the iron and pins, and it’s such a nice finish. I’m going to be doing them a lot more.

ImageWowow I like this dress a lot, and apart from the collar it’s really comfortable (I keep finding myself tugging it forward a bit). It doesn’t even use up much more fabric than any other dress, so I’m hopefully going have my dream of a wardrobe half filled with shirtwaist dresses!! Just need to find the fabric for them first…

ImageI run out of poses, okay?

Image

I’m also going to count this as a Sew Dolly Clackett entry. She has made a few similar shirtwaist dresses, and although it’s not her classic style I did buy the fabric because of her inspiration.

Details

Pattern: Self-made, details in post

Fabric: Quilting cotton from fabric.com, about $30 after shipping

Notions: Buttons, 50c each. Thread, interfacing and zip from stash

Total: $31.50


I’d also like to show off another make: the Thetis Undershirt by Thread Theory.

ImageAfter some cheeky pointed emails to Morgan from Thread Theory, I was lucky enough to be able to test a soon-to-be-released pattern, the Thetis Undershirt. It’s designed to be a loose, v-neck for wearing as is, or under other clothes (such as a dress shirt – so many of those need a singlet to maintain modesty), and it will be released as a FREE pattern.

ImageIt’s a straight-forward top that uses very little fabric (I used an 80cm scrap piece of cotton-spandex). It is meant to be a loose style and I prefer Mr. Guy’s tops to be a bit more fitting so I did take it in at the sides a bit – Morgan recommends going down a size from your measurements if you prefer it fitted.

ImageI can see myself making a few of these; even though Mr. Guy said “I don’t need another singlet, I already have a black and a white one” he’s worn this one several times.

ImageI’m not 100% sure when the pattern will be released (it’ll be availble after Morgan and Matt get back from their USA roadtrip, I believe) but be sure to keep an eye out!